Simple, Beautiful and Predictable Class V Restorations
In general, people are retaining their teeth much longer than decades past. With this increase of tooth retention, the need to maintain and protect teeth has never been greater. Non-carious Class V lesions have become commonplace among an aging population. Toothbrush abrasion, acidic foods and drinks, and occlusal forces all contribute to the formation of non-carious Class V lesions. Class V lesions tend to be more prevalent in thin gingival biotypes.1 I see many untreated lesions enter my practice during new patient examinations. Often the patients report that their former dentist decided to watch or monitor those areas. I view these as missed opportunities to improve the function, longevity and beauty of our patient’s dentition. The decision to monitor, graft or protect these areas through bonding procedures is up to individual dentist and patient. My clinical observations over 30 years of practice has led me to either recommend grafting procedures or bonding procedures to protect these vulnerable surfaces from further damage. This article will describe a simple and predictable technique to protect non-carious Class V lesions from further damage and help maintain the structural integrity of individual teeth and the overall dentition.
Clinical Background
The patient presents with the complaint of pain to excessive temperatures on several teeth when eating. In particular she reports being very sensitive to cold food items on her maxillary left cuspid and first bicuspid. Clinical thermal testing confirms her report. Several treatment options were discussed including: a) desensitizing toothpaste, b) applying products designed to seal exposed dentin, c) grafting, and d) composite resin bonding. Ultimately, the patient decided that bonding was the most logical choice for her.
Pre-Operative Condition
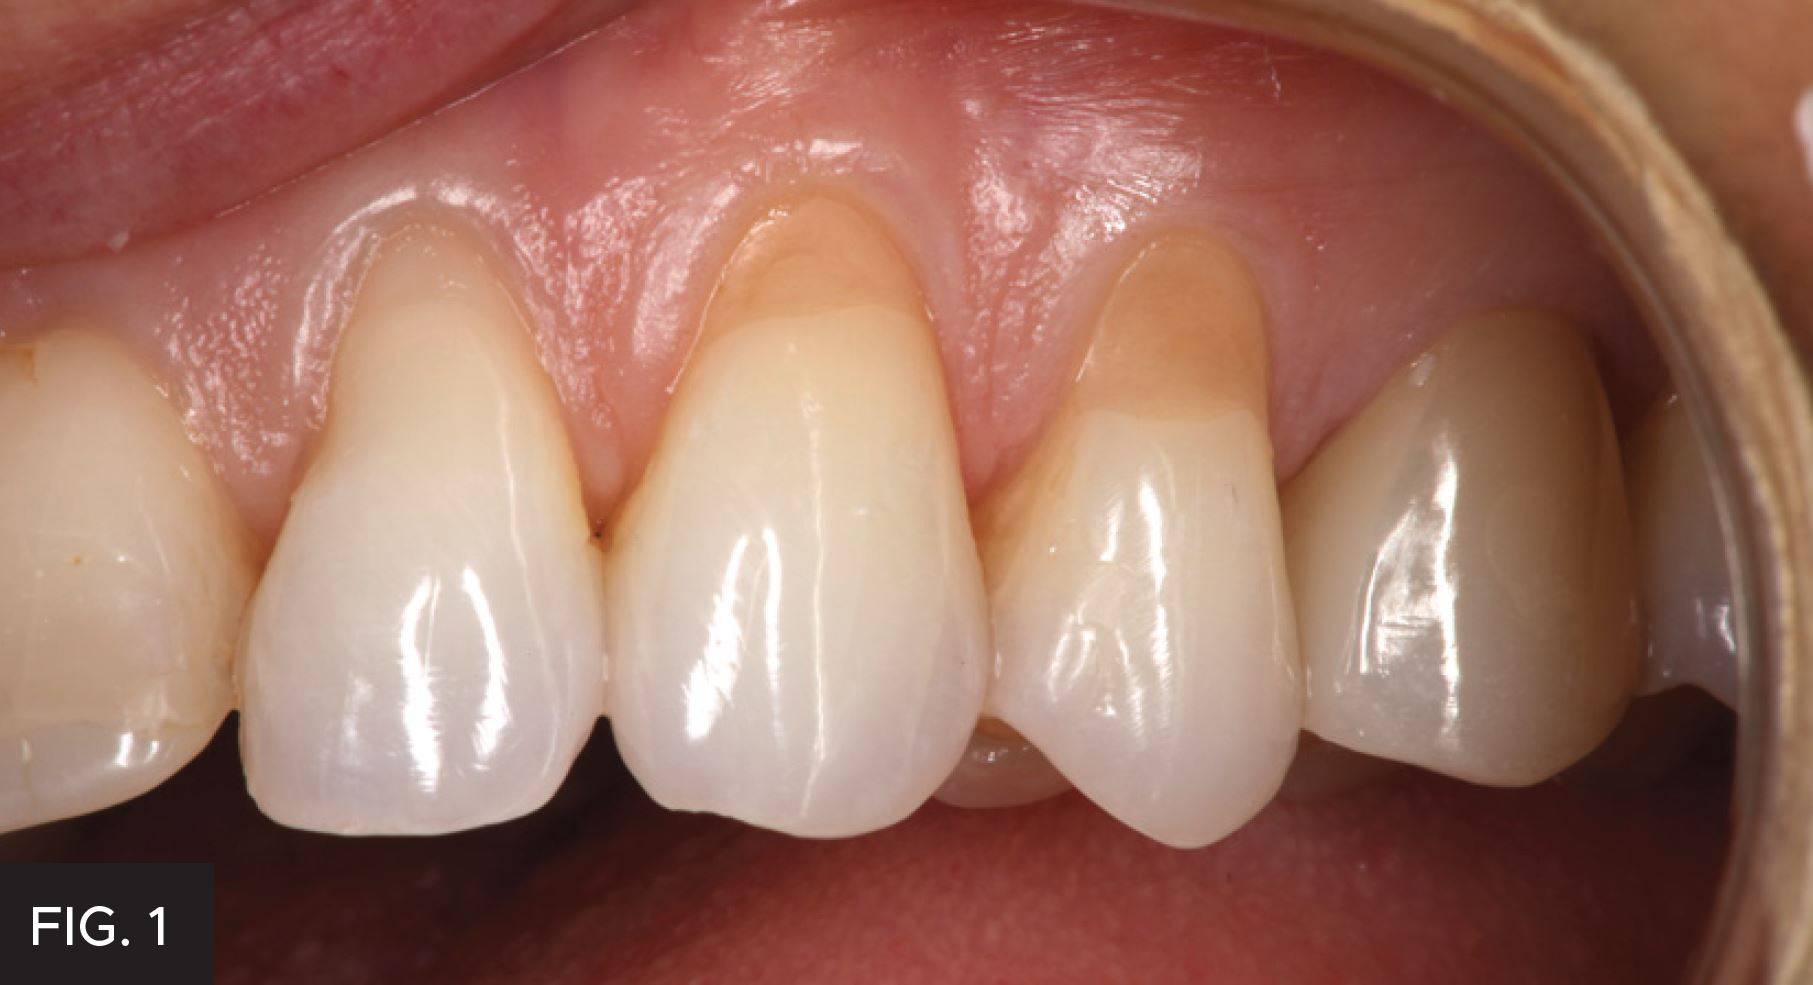
Careful examination of the non-carious Class V lesions on the maxillary left cuspid and first bicuspid show loss of tooth structure apical to the CEJ of the tooth. This is likely caused by overly aggressive brushing and chemical wear from acidic foods and drinks. Occlusal wear from grinding is present and a likely co-contributor to this clinical condition. (FIG 1)
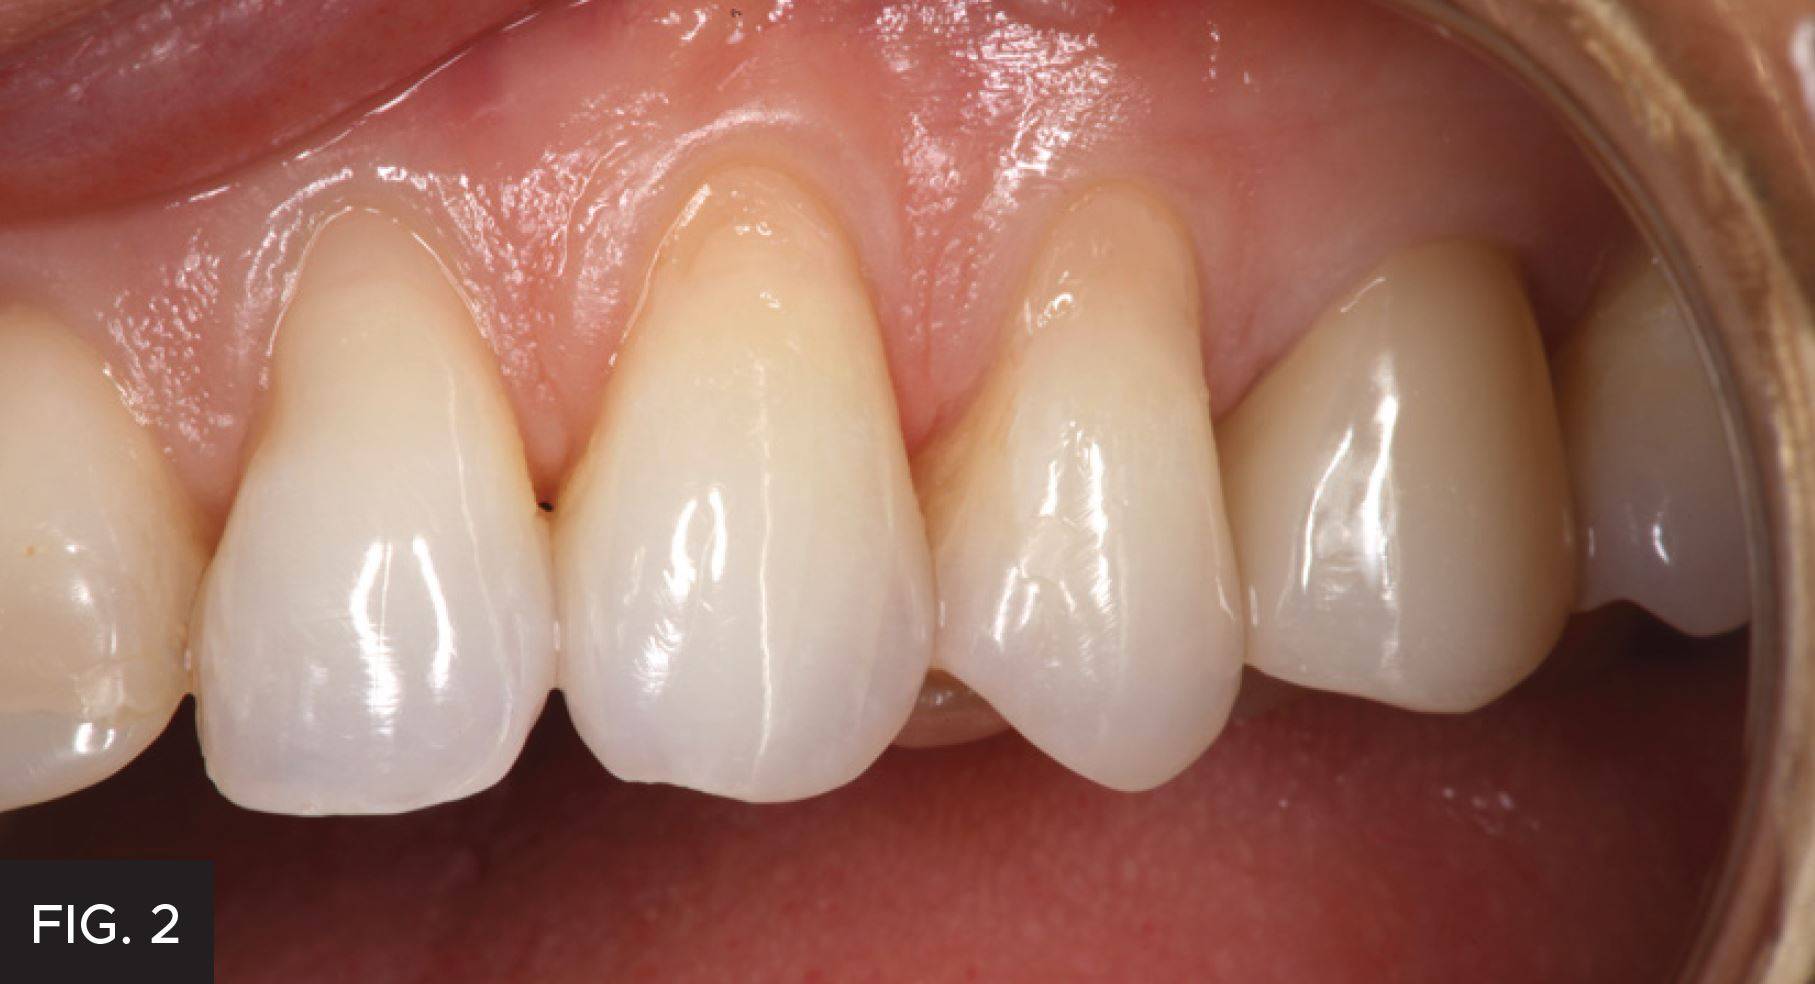
Step 1: Selecting the Appropriate Shade
A test of several shades of Evanesce Flow are placed on the tooth and cured. If a more translucent result is desired, A1E Evanesce Flow (Clinician’s Choice) can be used. It has an opacity value of 80%, similar to natural enamel. If a more opaque material is desired A1U can be employed, as it is 85% opaque. In this case B1E and A1U were both tested. A1U is placed on the cuspid and B1E is on the bicuspid. A1U was selected as it has the best color match and opacity for this clinical case. This step must be done before any potential dehydration occurs. (FIG 2)
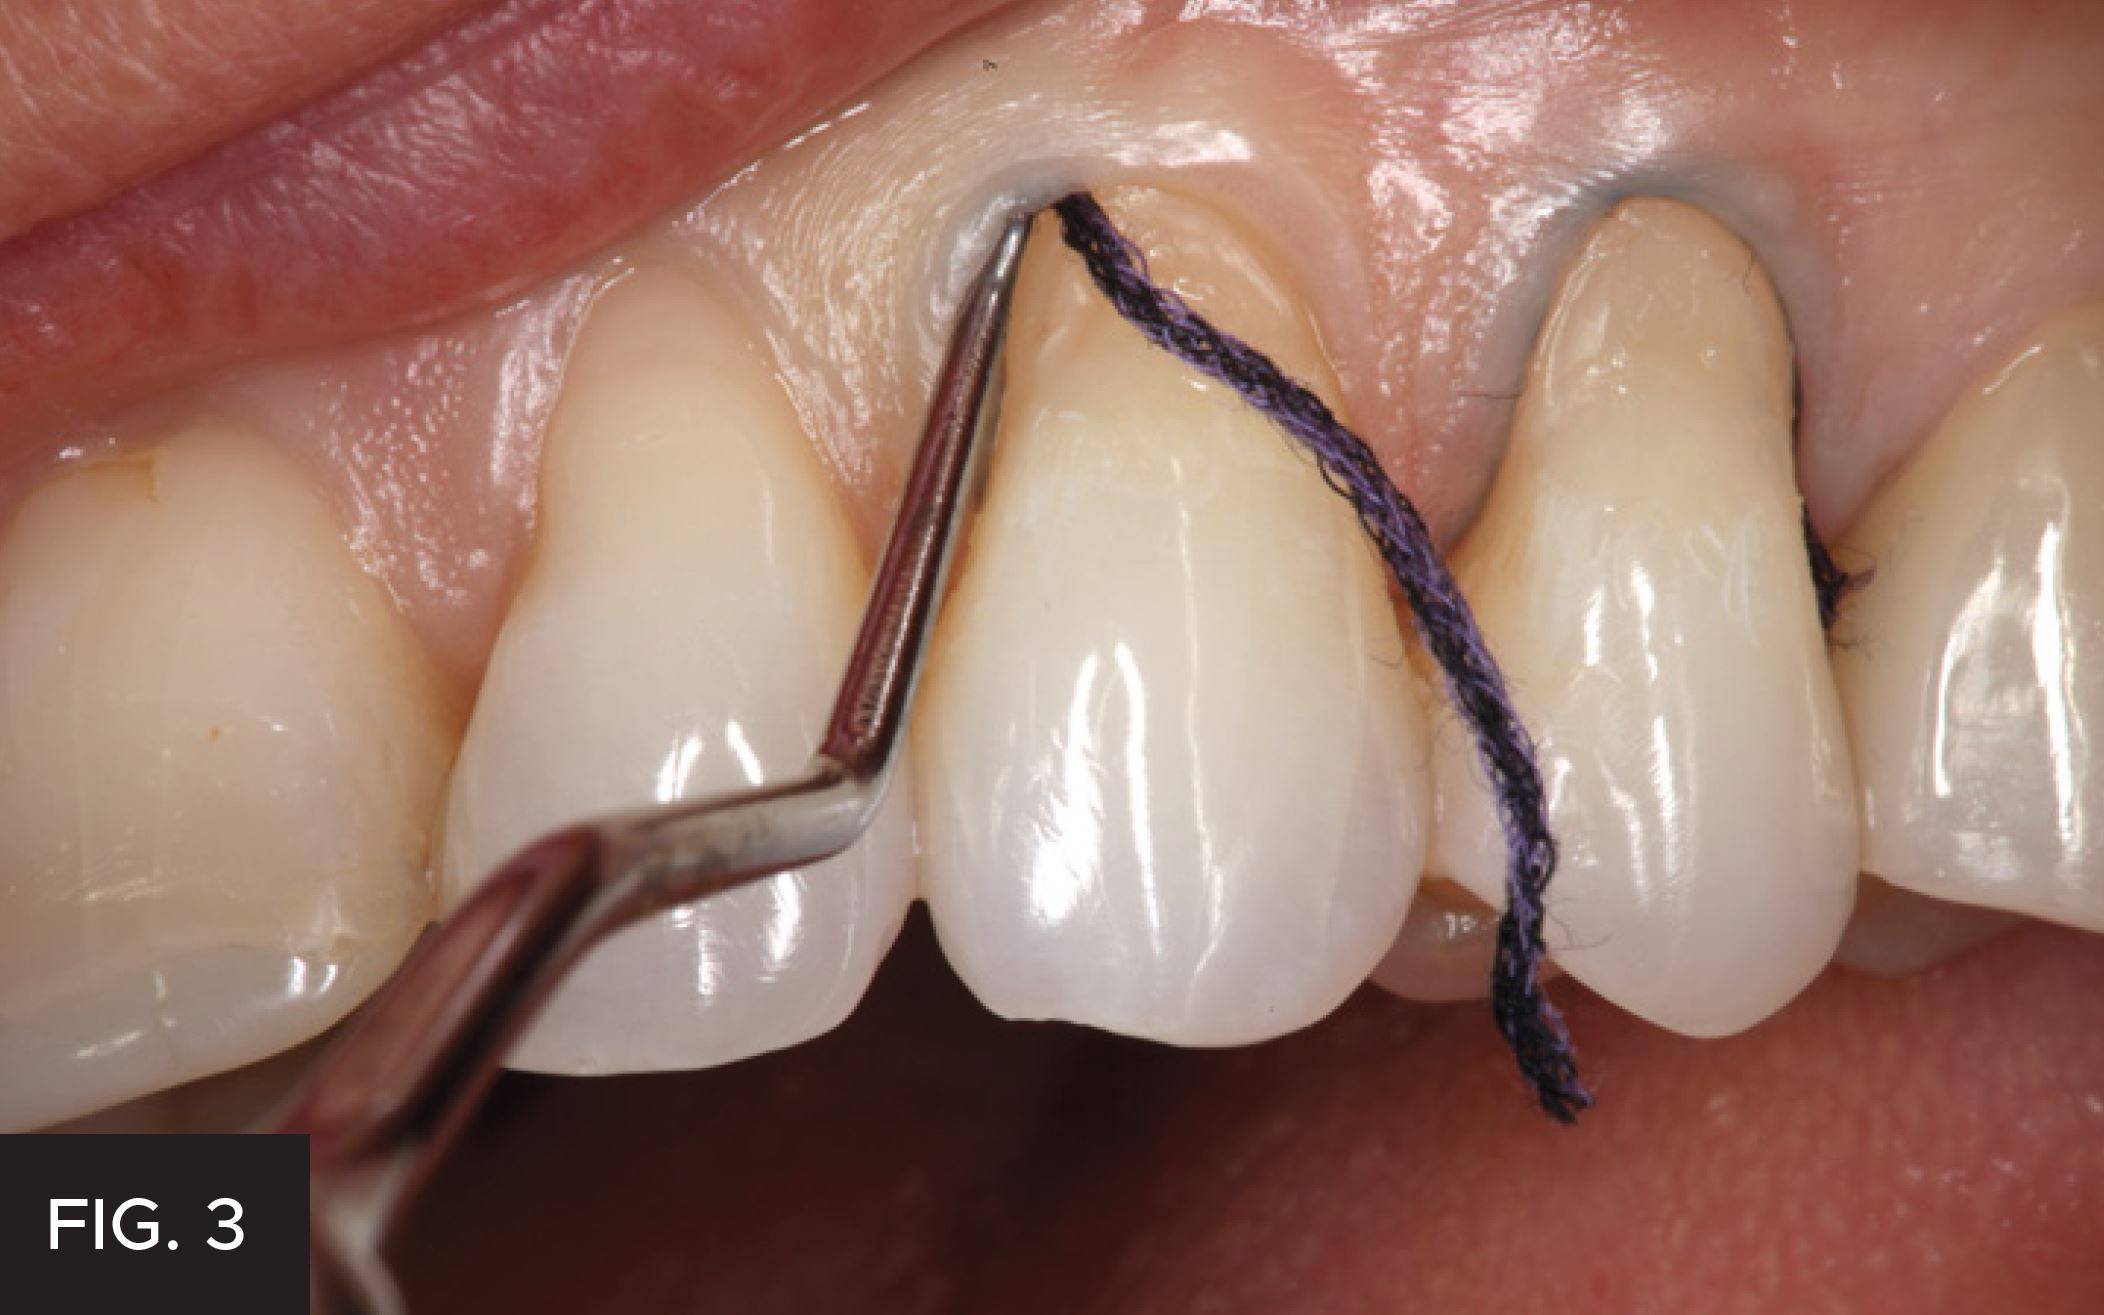
Step 2: Preparing the Soft Tissue
The teeth are anesthetized using buccal infiltration with 4% Septocaine, Epi. 1:100,000. Retraction cord is placed on the facial of each of the teeth to be restored. Ultrapak Cord (Ultradent) #000 is placed using a small non-serrated Slide Packer (Ultradent). Special care must be taken to prevent damage to the periodontium. Using the smallest cord that provides adequate retraction will help prevent damage to the attachment apparatus. (FIG 3)
Step 3: Preparing the Teeth
The teeth are prepared at the CEJ with an irregular bevel. This bevel varies in height and depth across the entire enamel portion of the CEJ. This irregular bevel accomplishes two things. First it enhances the overall bond to tooth structure. Second, it is critical for hiding the restorative material and creating a seamless restoration. If a microetcher is available, the preparation should be abraded with 27 micron aluminum oxide. Sandblasting the surface of the tooth will remove contaminants and increase bond strength by creating microporosities on the surface of the tooth.
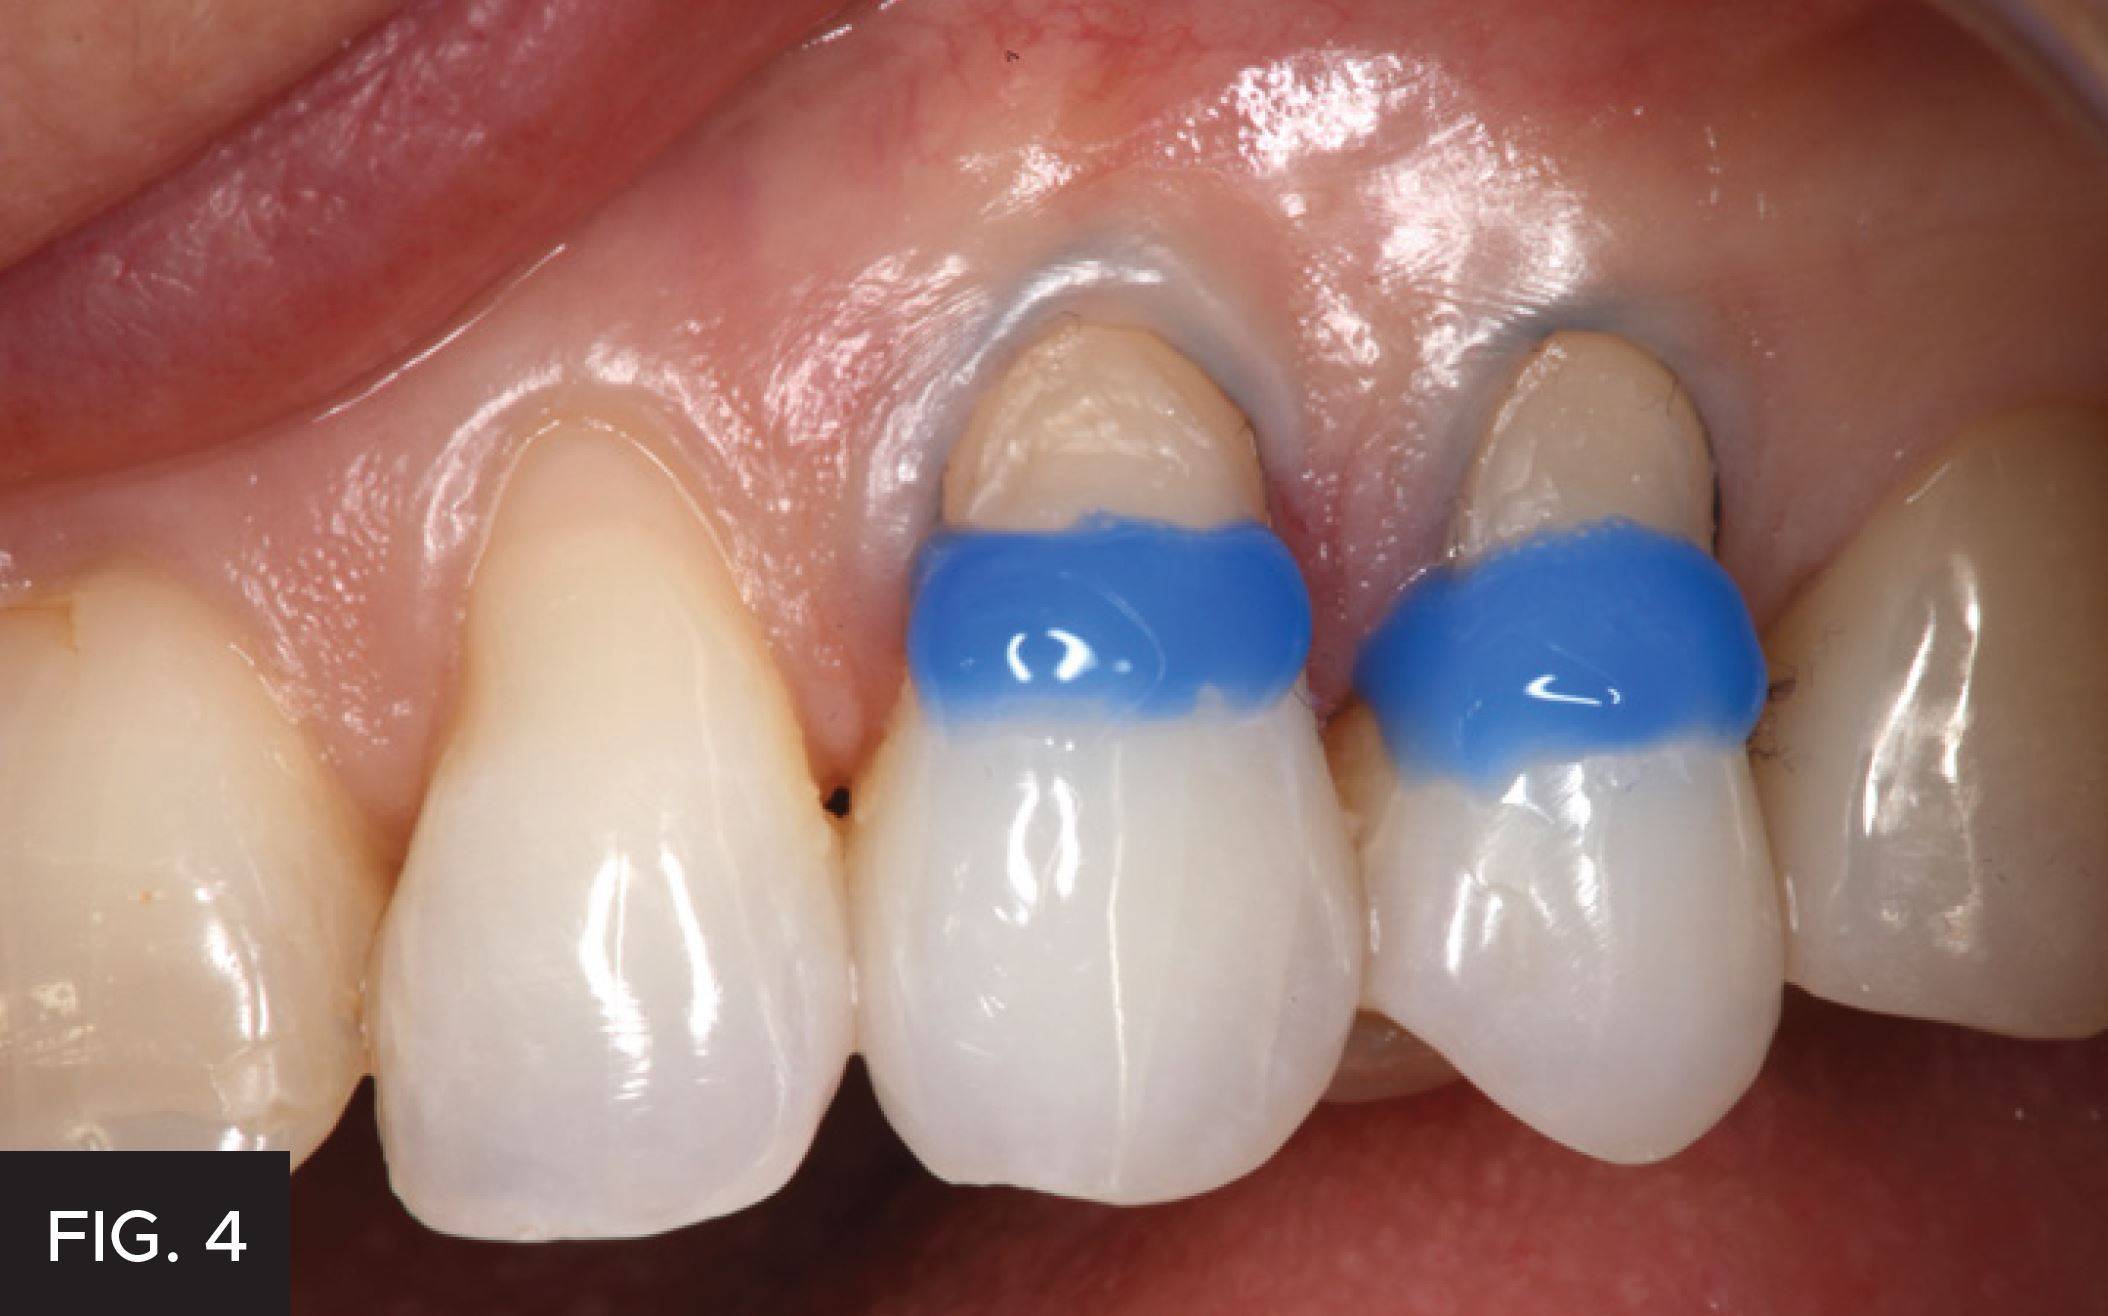
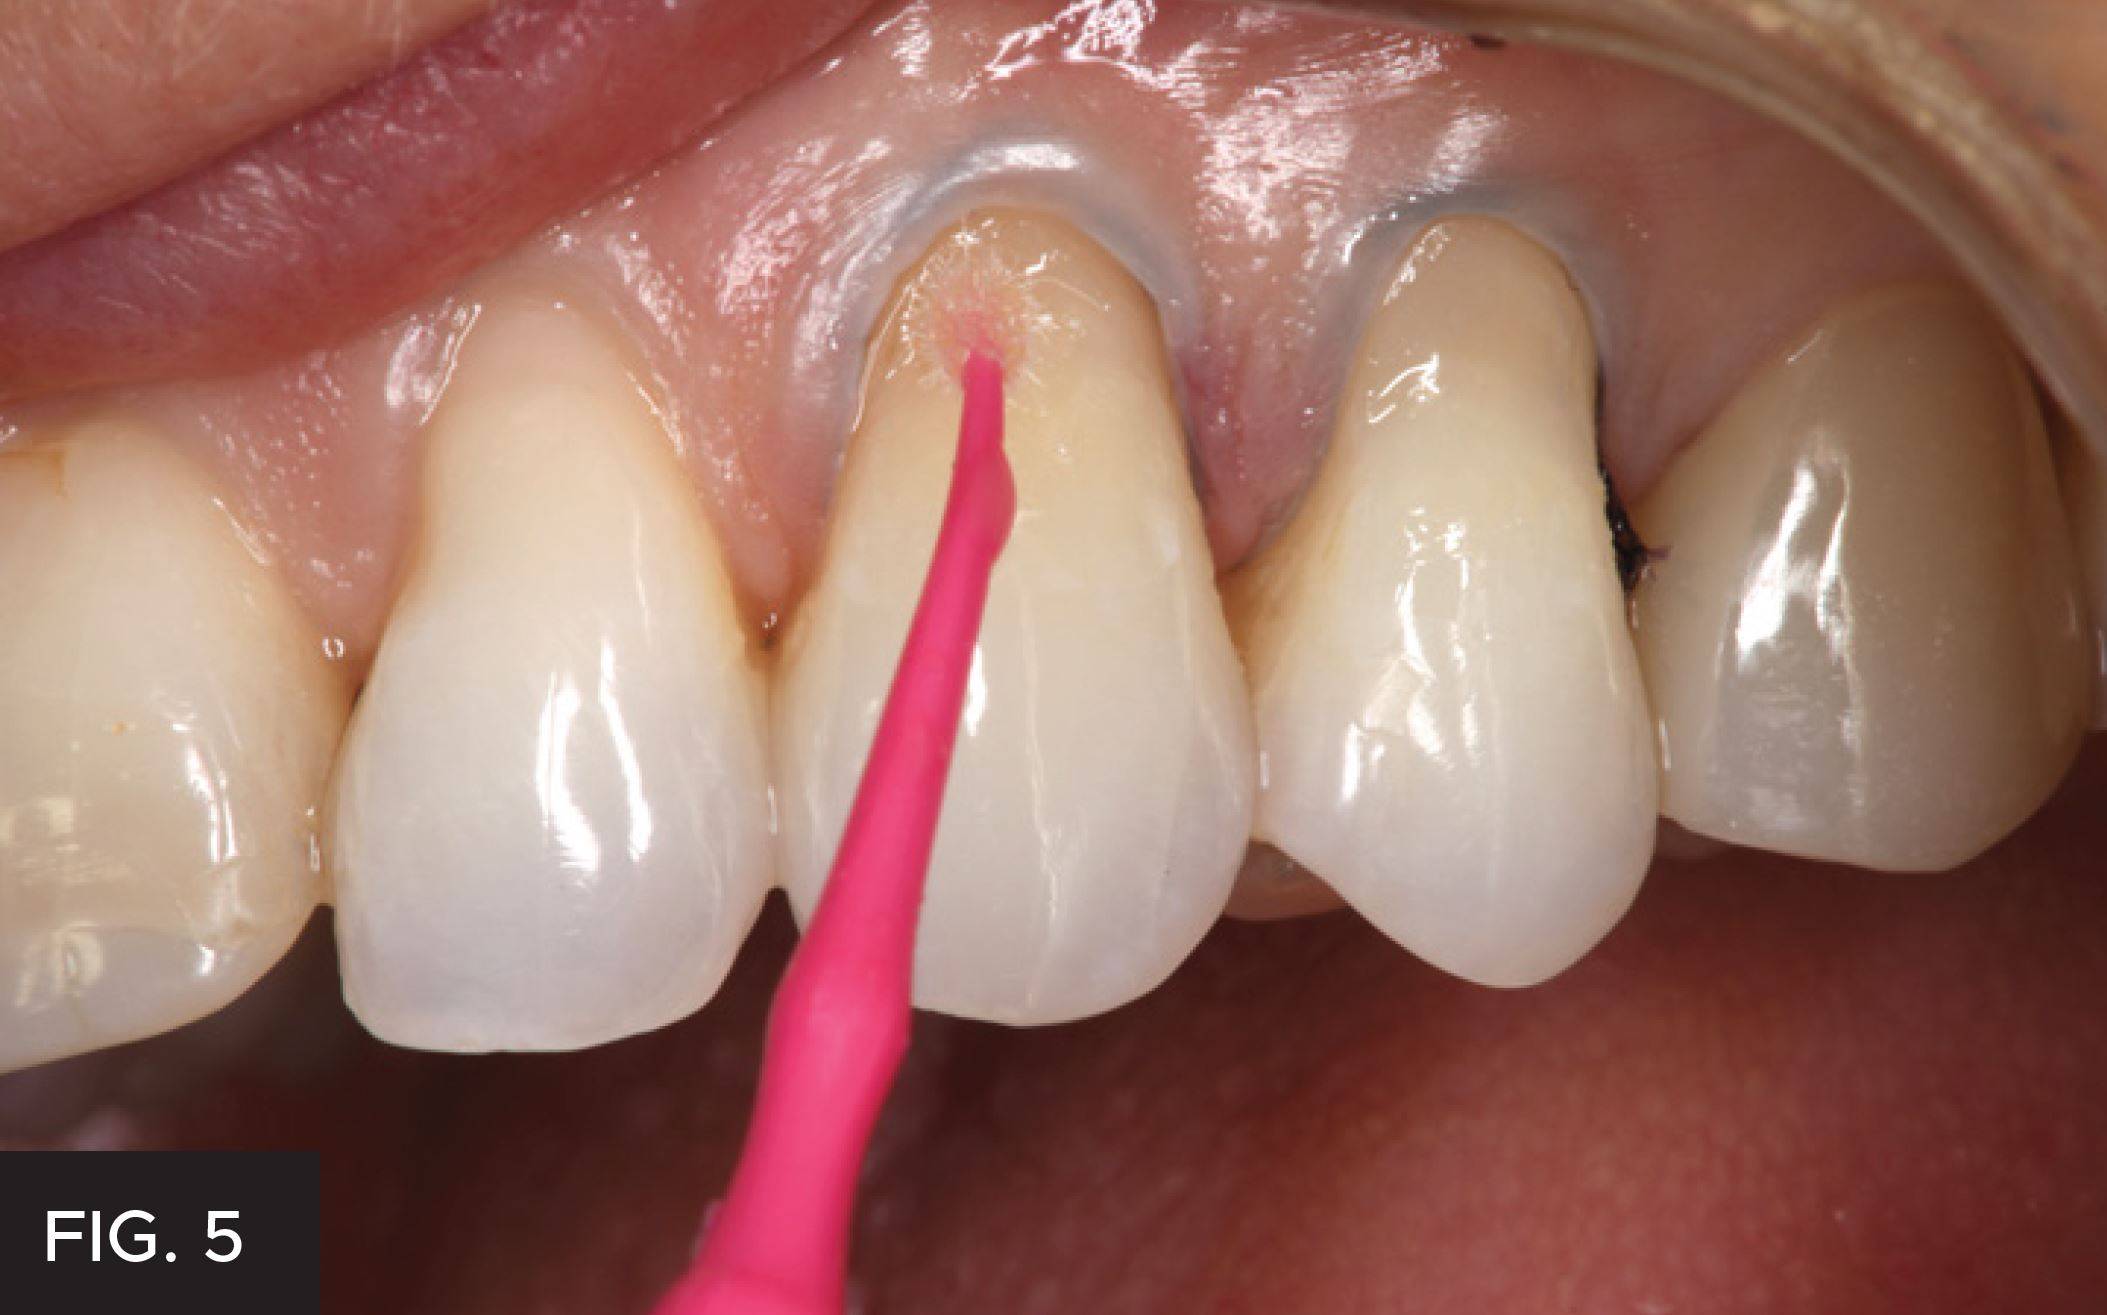
Step 4: The Adhesive Procedure
There are three choices for adhesive bonding in the cervical region of a tooth. A total-etch technique, a self-etch technique, or a selective-etch technique. To diminish staining potential and premature marginal breakdown, a selective etch technique is employed.2 This procedure is accomplished using Ultra-Etch, Peak SE and Peak Universal Bond (Ultradent). (FIG 4 and 5)
Alternatively, a total-etch adhesive such as MPa Max (Clinician’s Choice) can we used. When total-etch adhesives are used, it is recommended to also use a glutaraldehyde-based desensitizer such as G5 (Clinician’s Choice).
Step 5: Restorative Material Placement
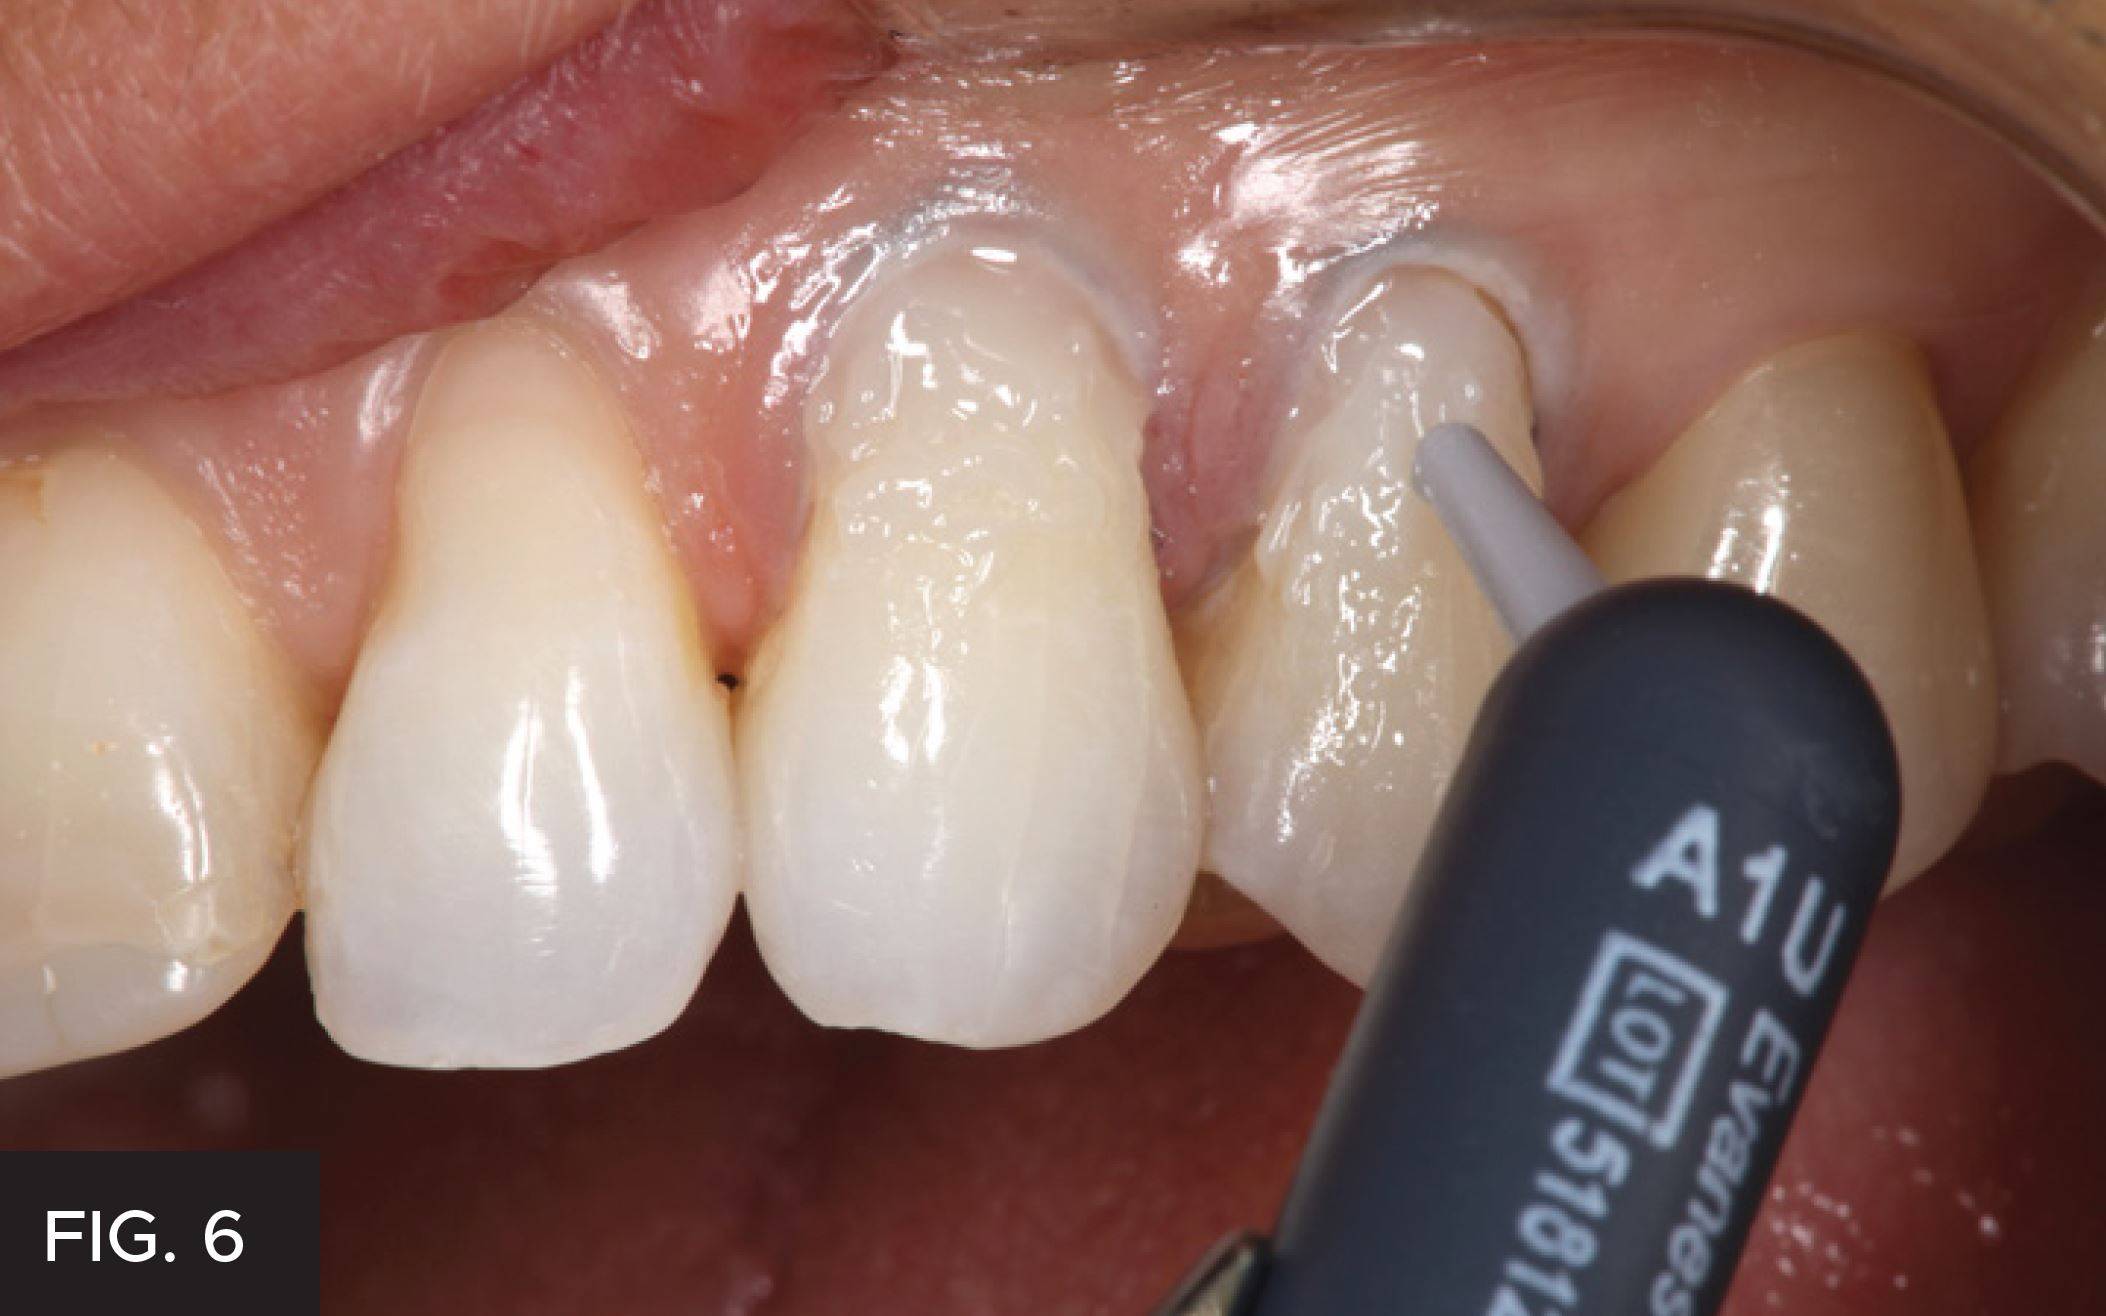
To make cervical restorations disappear seamlessly, the proper opacity of restorative material must be selected. In this case A1U Evanesce Flow (Clinician’s Choice) is used. This material possesses ideal thixotropic handling characteristics for easy placement and has an 85% opacity. Evanesce Flow has excellent optical properties resulting in an ideal blend with natural tooth structure. It is advised that the material be placed on the tooth and cured prior to beginning the procedure to ensure ideal color and opacity. The depth of the lesion should determine how many layers are required. In this clinical situation two layers are placed. (FIG 6)
Step 6: Contouring and Polishing the Restorations
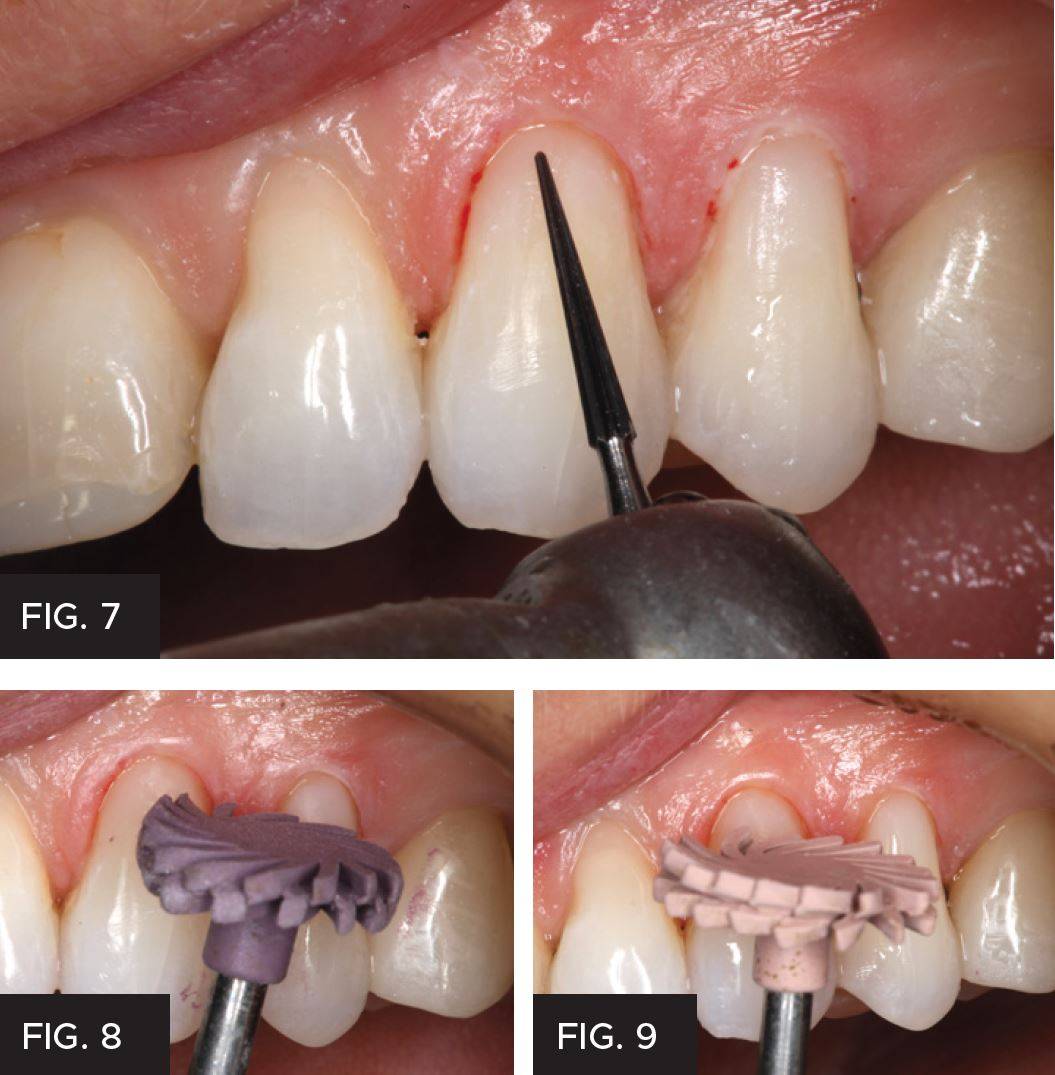
To establish initial contour of the restoration a 12-fluted carbide finishing bur (EF9 NeoBurr, Microcopy, Komet® FS9 H135) is employed. Care must be taken to maintain the height of contour in the cervical 1/3 of the tooth. This is accomplished with proper bur angulation. To do this, begin by refining the cervical third of the tooth first. The bur should only be cutting about 2mm from the tip. Once you have cleared the cervical area, the bur is flatted along the middle third of the tooth. Once the contouring is completed, the restoration is polished using A.S.A.P. All Surface Access Polishers, a two step polishing system from Clinician’s Choice. The design of these diamond-impregnated polishers very quickly establishes a high luster without damage to the established contours of the restoration. (FIG 7, 8 and 9)
The Final Result
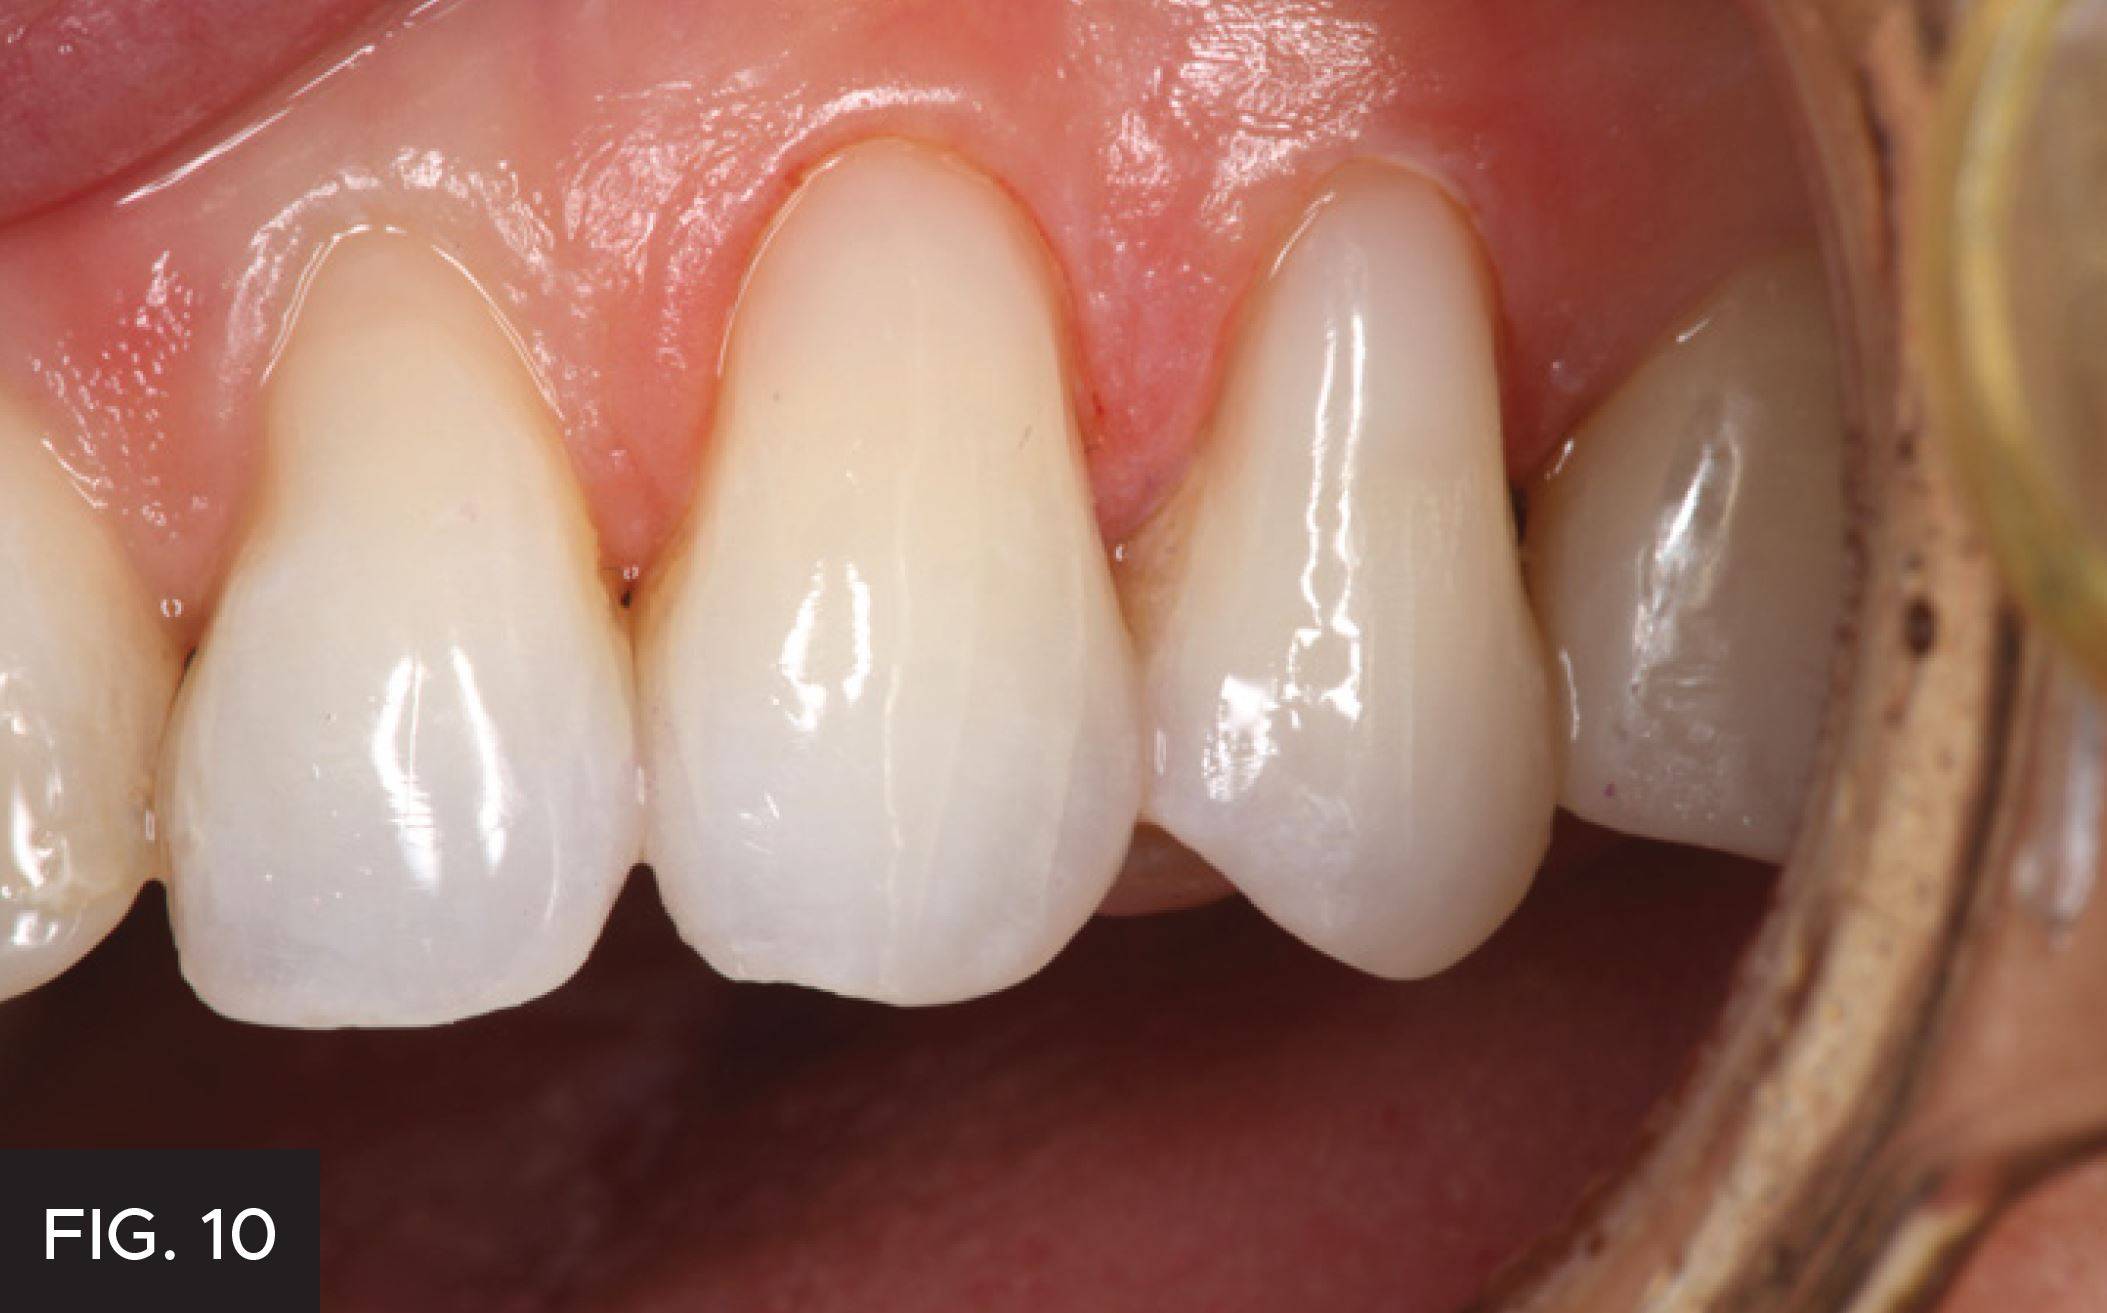
FIG 10 shows the final result. It is virtually impossible to see where the restoration ends and the tooth begins. Successful Class V restorations require strict adherence to proper adhesive protocols, material opacity selection and finishing/polishing techniques. When restored properly, these composite restorations will service the patient for years to come. Drawing attention to the benefits of restoring these Class V with patients, to help prevent future damage is not only efficacious but a good practice builder. This is accomplished by close adherence to the techniques described in the article.
Images courtesy of Marc Geissberger, DDS, MA
REFERENCES
1. Cortellini, P., Bissada, N., Mucogingival conditionsa in the natural dentition: Narrative review, case definitions, and diagnostic considerations. J. Periodontol. 2018;89(Suppl 1):S204-S213
2. Peumans M. et al., Eight-year Clinical Evaluation of a 2-step, Self-etch Adhesive with and without Selective Etching. Dent Mater. 2010 Dec.
About the Author

Marc Geissberger, DDS, MA
Dr. Geissberger graduated from University of the Pacific in 1991 obtaining his dental degree and was elected to Omicron Kappa Upsilon as a student. Currently he is Adjunct Clinical Professor in the Department of Preventative and Restorative Dentistry at the University of the Pacific. He directed the University’s Aesthetic and Complex Care Clinic and teaches many hands-on CE courses in Restorative Dentistry. He maintains a private practice focused on reconstructive and esthetic dentistry in Greenbrae, CA.
Discover More
This article was originally published in the Clinical Life™ magazine: Fall 2021 edition
Clinical Life™ magazine is a premier periodical publication by Clinical Research Dental Supplies & Services Inc. Discover compelling clinical cases from Canadian and US dental professionals, cutting-edge techniques, product insights, and continuing education events.
Subscribe to our emails to receive articles like this and be notified about our exclusive promotions.