
Step by Step Protocol for Consistently Creating Invisible Class IV Restorations
In the world of cosmetic dentistry lives the ever-challenging Class IV restoration. The success of this restoration lies in the ability to restore function and esthetics while utilizing the risk profile analysis for seamlessly blended, long lasting restorations. Advancements in composite dentistry and the materials available today combined with the understanding of form and function give results that mimic what nature gave us in our natural dentition. By utilizing photography, principles of shade selection, an understanding of occlusion, and material choices, we are able to increase patient satisfaction while enhancing our cosmetic composite artistry skills.
This article serves to provide a systemized approach to the analysis and protocol for creating camouflaged Class IV restorations with a focus on materials that
aid in enhancing our dentistry. This enhancement is a direct result of our improved ability to select and utilize optimal dental materials and advanced techniques that
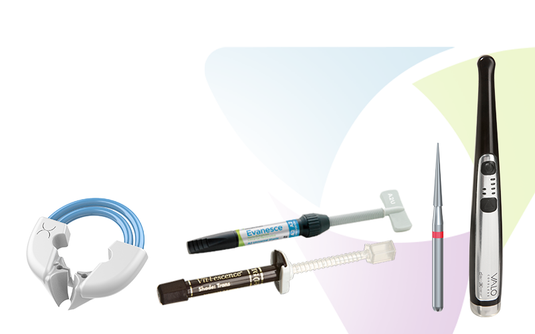
result in composite restorations that rival porcelain. Clinician’s Choice Evanesce Nano-Enhanced Universal Composite is a prime example of a composite that
provides ease-of-use with a simplified shade selection all the while obtaining highly esthetic clinical results that we all endeavor to achieve.
Step 1: Occlusion & Trauma Assessment
The Class IV restoration begins with the assessment of the risk profile and occlusal parameters, essential for a successful restoration. (FIG. 1) While it can also
include occlusal parameters, the risk profile may also take into account the patient’s age, expectations, shade complexity, and oral behavioural habits. The etiology of
the lesion should be determined to avoid complications post operatively. By checking for occlusal trauma, interferences, constricted envelopes, and health of pulpal
tissues, we are better able to gauge the likelihood of success and longevity with our restorations.

FIG. 1
Pre-op image of tooth #8. It is at this point that the risk profile and occlusal parameters are assessed.
Selection
Prior to beginning a Class IV restoration, photography with a DSLR camera will aid in shade selection, tint selection, characterizations, translucencies, and material selection. While assessing the shade, taking a monochrome photo will help with selecting the value which is arguably the most important factor in shade selection. After narrowing down the shade, photos can be taken with composite placed on the tooth in order to compare the selected shade to the natural dentition, taking into account the thickness of material and reflections from flashes. (FIG. 2a & 2b)
By utilizing polarized lenses in our photography, we are able to eliminate unwanted reflections caused by flashes and help with visualizing deep tints, decalcifications, and characterizations within the dentition. (FIG. 3a & 3b)
These images can be saved and referenced throughout the procedure to ensure that in-op tooth dehydration does not alter the clinical result.
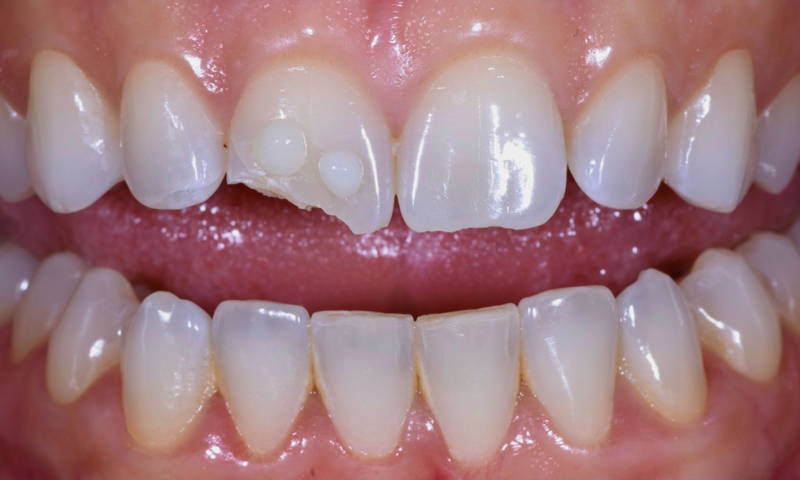
FIG. 2A
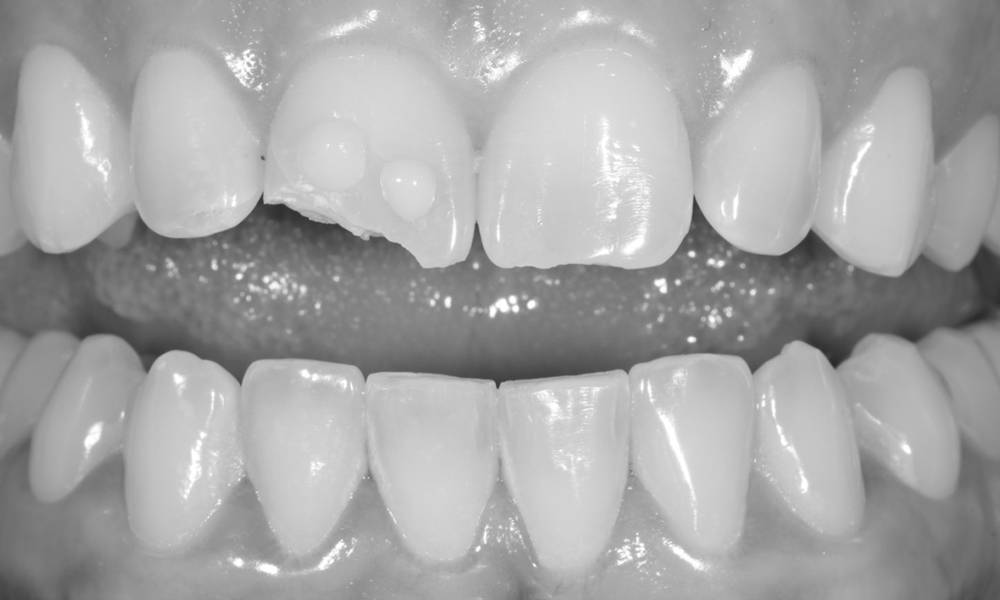
FIG. 2B
Potential composite shades are placed, without bond, on the tooth in the anticipated thickness and light cured. This, along with a monochromatic image will greatly aid in the selection of composite shade and value.
Step 3: Prep Design
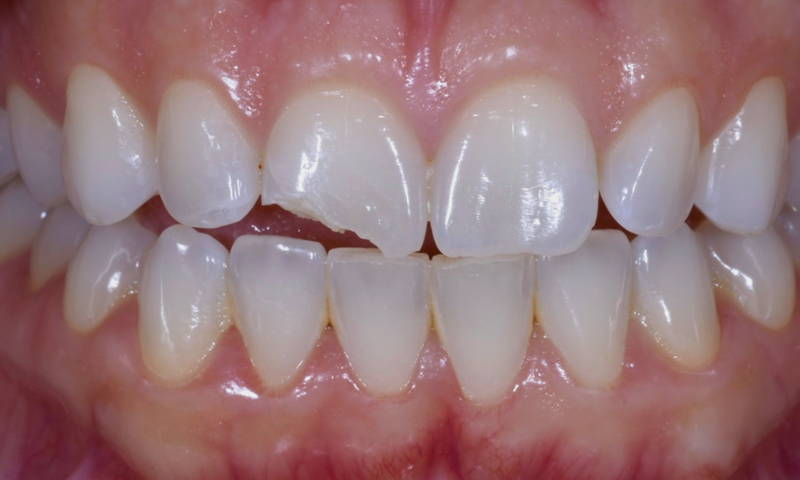
FIG. 3A
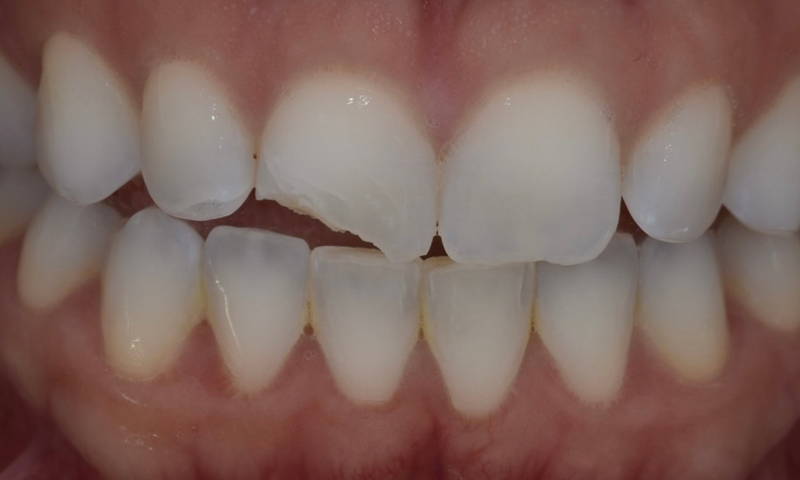
FIG. 3B
The elimination of reflections from flashes using a polarized lens. This allows for better visualization of both surface and deeper tooth characterizations.
To truly camouflage a Class IV restoration, I utilize a 2mm facial bevel and an irregular and shallow facial chamfer. This step is beneficial in allowing for a proper
blending of the composite into the natural dentition and undetectable restorations.
Step 4: Isolation
Proper tooth isolation is crucial for any bonded restoration to avoid contamination in the bonding process and therefore critical for success in our restorations. For ease of composite layering and manipulation, Teflon tape can be placed on adjacent teeth instead of the commonly used mylar strip. Teflon tape is utilized as it aids in easier manipulation of the composite material, without a mylar strip physically getting in the way. (FIG. 4)
Once isolated, manufacturer recommended steps of etching with 35% Phosphoric Acid and Universal Adhesive placement should be followed prior to composite layering. I utilize a Universal Adhesive due its versatility, compatibility, and ability to bond to all substrates with a single bottle.
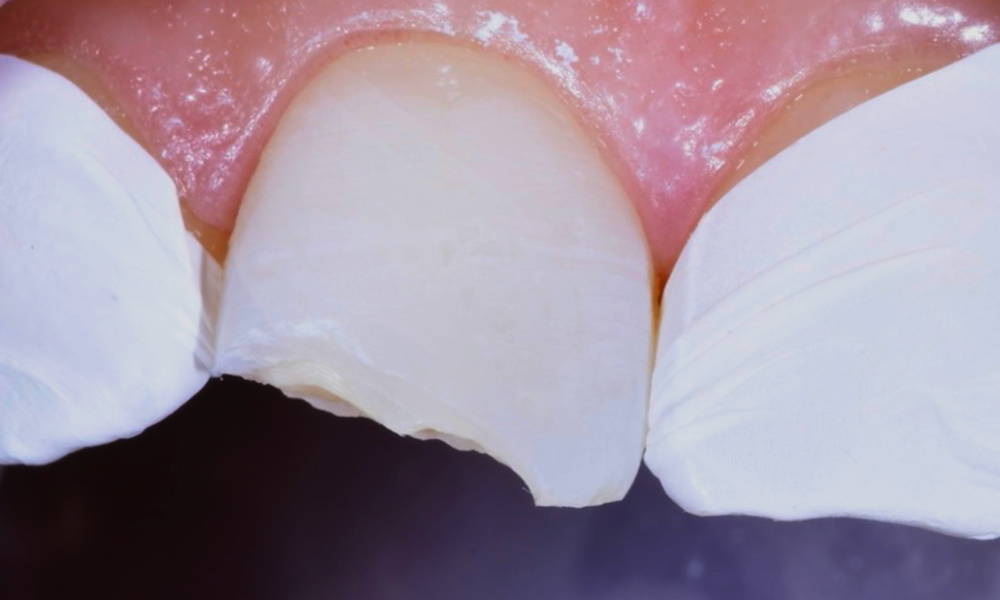
FIG. 4
Teflon tape is applied to the adjacent teeth to provide isolation for the fractured tooth.
Step 5: Lingual Matrix
If time allows, a lingual putty matrix can be fabricated from a wax-up done prior to the Class IV restoration appointment, thus allowing for the easier formation of the lingual shelf. However, since many of the Class IV restorative procedures require immediate care for patient satisfaction, I like to build my lingual shelf by layering the composite with my index finger serving as my lingual matrix. (FIG. 5a & 5b)
The lingual shelf consists of a very thin layer of composite and is used to create the foundation for composite layering (if utilizing this technique).
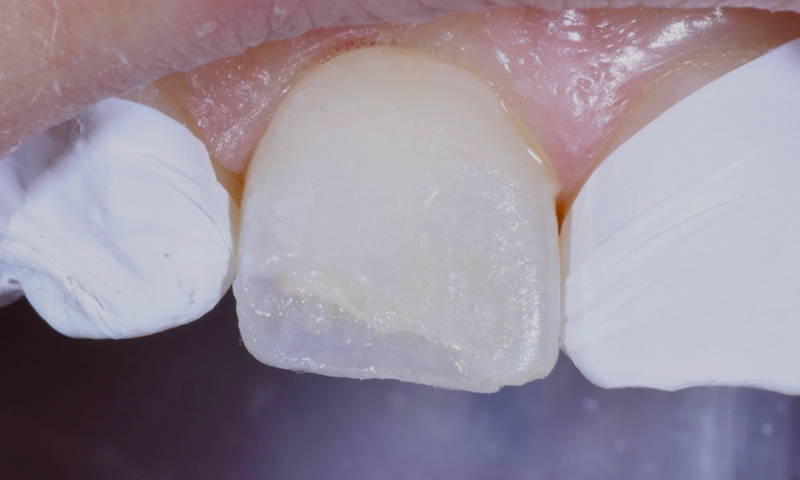
FIG. 5A
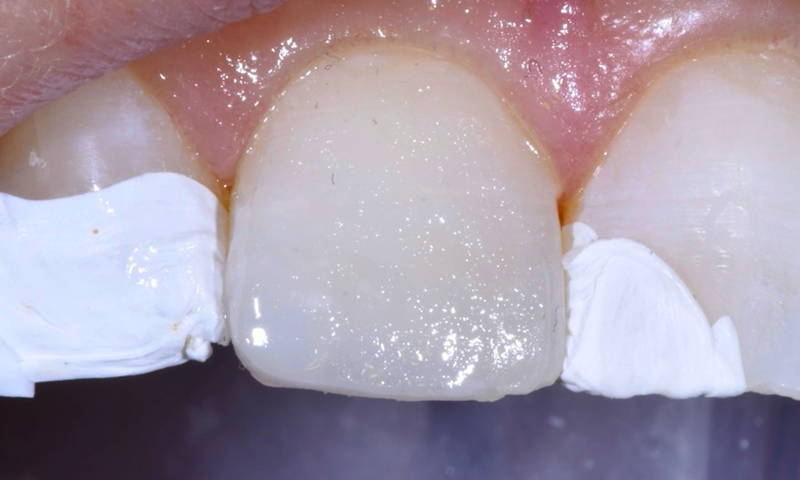
FIG. 5B
Lingual shelf placed using either a lingual matrix or the convexity of a finger to establish lingual contour and position. Subsequent layer(s) are placed over this.
Step 6: Building in the Tooth Layers
A commonly used and favorite technique for Class IV restoration is by layering composite from the lingual shelf to the buccal, traditionally incorporating dentin layer, tints, and achromatic & chromatic enamel layers. With the addition of Clinician’s Choice Evanesce Nano-Enhanced Universal Composite, the need for multiple shades may be eliminated without sacrificing optimal results if the existing dentition does not exhibit areas of translucency. At 85% opacity, Evanesce Universal composite mimics the natural opacity of most dentitions while the ease of handling the material creates a beautiful blend with the natural dentition, leading to undetectable
Class IV restorations. For those clinical cases requiring a more layered approach of differing opacities, Evanesce has multiple opacities available.
Typically, I will place the dentin layer, light cure, apply any tints or stains and light cure, then the final enamel layer. If a proximal contact is required, I will use the pull-through technique with the enamel layer. Initial placement of the composite can be done using a variety of instrumentation; however ResinBlend LV (Clinician’s Choice) is a wonderful adjunct to an esthetic composite armamentarium as a composite wetting agent. By applying ResinBlend LV sparingly to a #3 composite brush, it enables the enhanced manipulation of composite without altering the optical properties of the material. If incisal and proximal translucency is encountered, I utilize either violet or blue tints to mimic the translucency.
Step 7: Shape
Shaping the composite to mimic the anatomy of the adjacent dentition is crucial for optimal results in our Class IV restorations. A systemized approach is to first shape the incisal edge with a focus on the incisal embrasures, then the facial lines angles, and lastly the bulk interproximal to the facial line angles. This is done by simply using a pencil and drawing on the unpolished restoration and tooth we are mimicking. Finishing discs are ideal for adjusting the length, embrasures and line angles. I like to have an alcohol gauze on hand to remove all pencil marks to make proper assessments between modifications to the restoration.
Step 8: Polish
A benefit of the Evanesce Nano-Enhanced Universal Composite material is the high polish potential for maximum esthetic results. A.S.A.P. All Surface Access Polishers (Clinician’s Choice) 2-step diamond polishers can be used for a satin or gloss polish depending on the shine present on the adjacent dentition we are matching. Both the Pre-polisher and Final High Shine Polisher have diamond particles embedded within and create a beautiful polish within a minute without altering the anatomy established in Step 7.
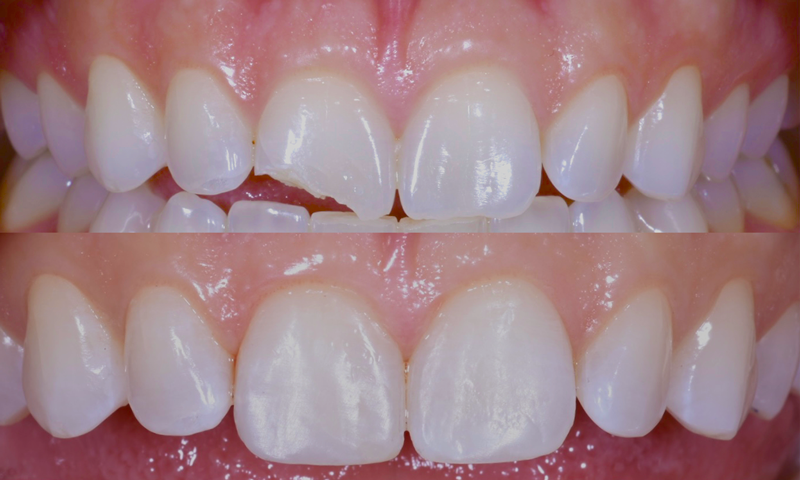
FIG. 6
By following an established protocol involving diagnosis, composite choice, shade, placement, and polishing, consistently achieving highly esthetic composite restorations is possible.
Conclusion
By having a systemized approach to composite artistry and utilizing advancements in materials we are able to achieve increased success and esthetics of our Class IV restorations. (FIG. 6)
As newer materials hit the market, we are able to create beautiful restorations while increasing patient satisfaction within our long-lasting results.
About the Author

Jenny Perna, DMD
Dr. Jenny Perna is a general dentist with a focus on cosmetics in South Florida. She has accumulated over 500 hours of continuing education in advanced procedures such as implant
services, Invisalign, smile rejuvenations, and root canal therapies. Her goal is to make every patient feel at ease
and comfortable with a complete understanding of their dental needs during their dental visits. She currently runs an Instagram dental blog: @yogi_dentist where she is able to reach a larger audience with her goals in mind. She has
been a guest on popular dental podcasts such as
Bulletproof Dental Practice podcast, The Dental A Team, and Dental Hacks, All-In-Podcast. Dr. Perna values the opportunity
to both positively impact her patients’ lives and share tools that help the successes of her dental colleagues.
Discover More
This article was originally published in the Clinical Life™ magazine: Spring 2023 edition
Clinical Life™ magazine is a premier periodical publication by Clinical Research Dental Supplies & Services Inc. Discover compelling clinical cases from Canadian and US dental professionals, cutting-edge techniques, product insights, and continuing education events.
Subscribe to our emails to receive articles like this and be notified about our exclusive promotions.